

Breaking Down & Demystifying: Chaturanga Dandasana
Author: Kelly Foong | Photography: Jamie Zhou | Yoga Demo: Jowing Zhang

Chaturanga Dandasana (four-limbed staff pose) is a challenging posture even for more experienced practitioners. It is a pose that requires whole body awareness and time in order to build the necessary strength to execute it safely with stable alignment. Yet, it is a posture that is encountered over and over again in any vinyasa/flow based yoga classes. In the Ashtanga yoga tradition, which utilises a set series of sequences, there are 60 vinyasas (and thus, chaturanga) in the primary series alone!
Common Misalignments:
- Bum sticks up
- Belly sinks down
- Shoulders round/dip downwards
- Lowering too much (shoulders lower than elbows)
- Elbows wing out
Ideally, think of yourself as a plank of wood where everything stays in one line from the crown of your head all the way to the heels of your feet as you bend your arms back and aim towards creating a 90-degree angle in the arms.
If you find yourself dreading it whenever a teacher says “move through your vinyasa” and usually speed past chaturanga as quickly as possible to move to upward facing dog, don’t worry! Below are some ways that you can use props to modify chaturanga, teach you how to combat common misalignments and build muscle memory for the ideal shape. Remember it’s not about the end goal but the journey.
Modification 1: With a Bolster
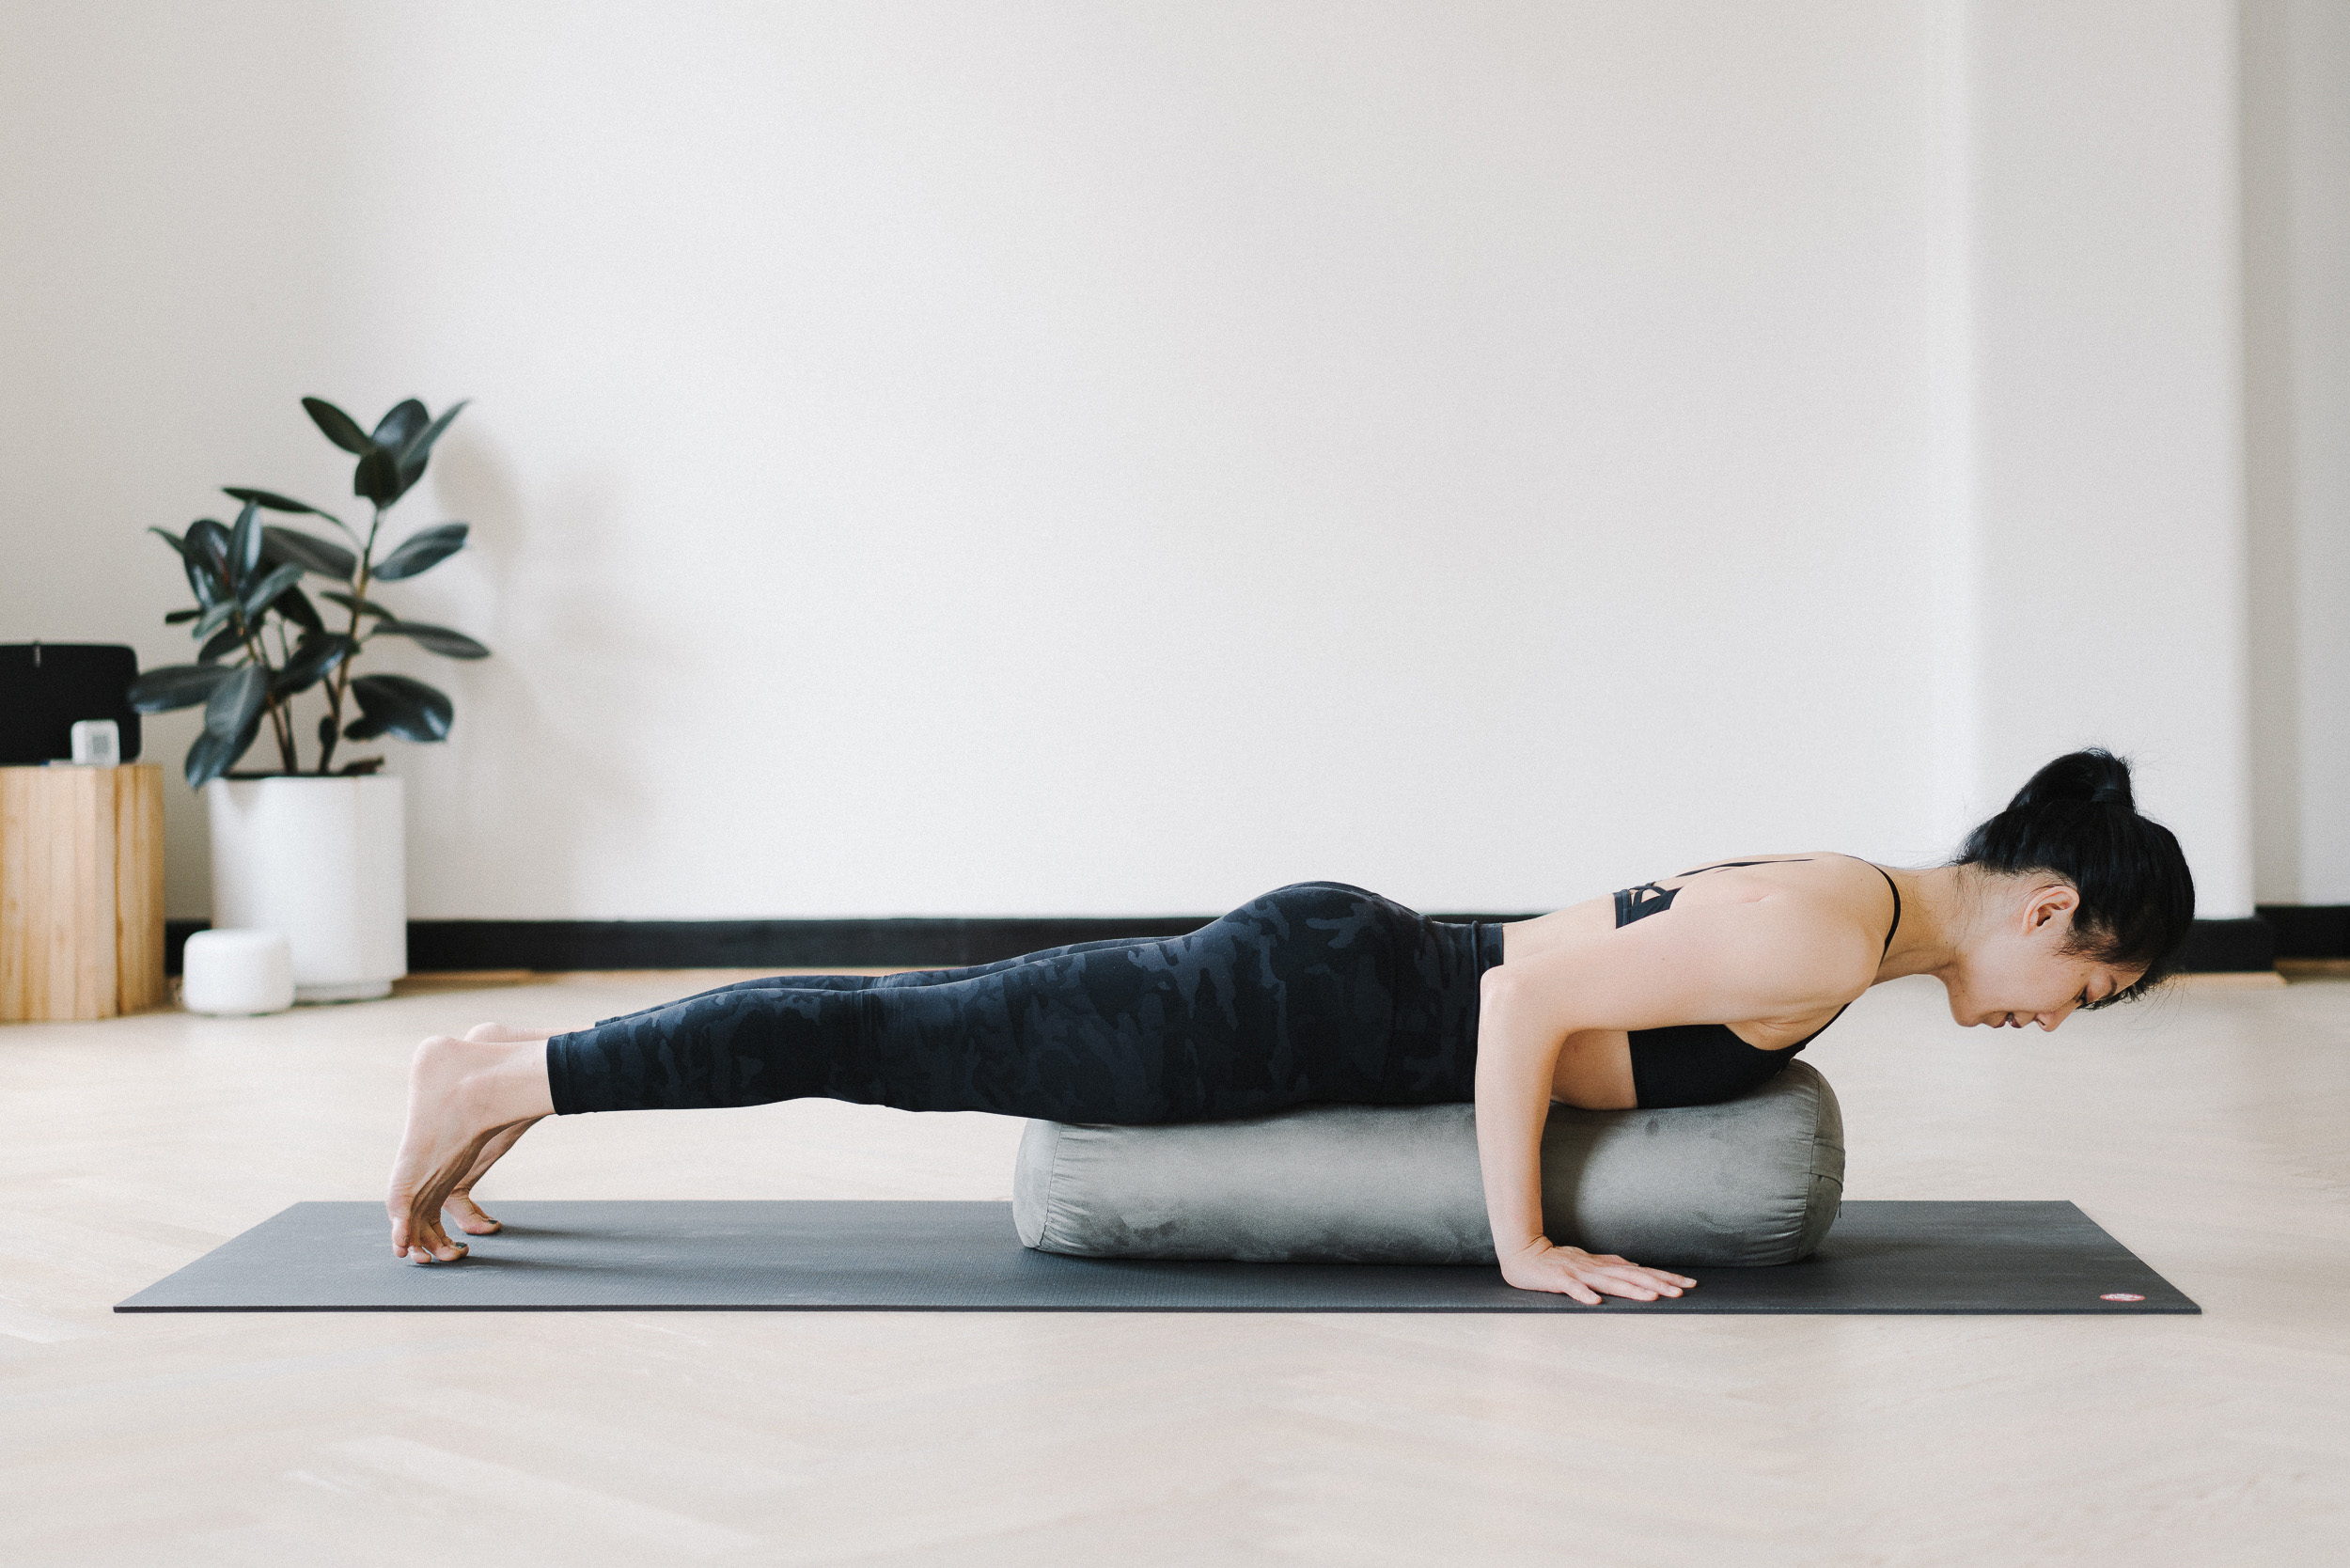
This is the most supportive way to give you the whole body feel for chaturanga without the physical demands of the pose as the bolster supports almost all of your weight. Focus on feeling the shoulder lifting away from the floor, squeezing your elbows towards your ribs and pushing out actively through the heels.
Modification 2: With Blocks

Place the blocks at the tallest height and shoulder distance apart. Start in a plank, shift your shoulders past your wrists, drop the knees down and then lower your shoulders onto the blocks. The blocks prevent your shoulders from drooping downwards or dropping too low, which causes unnecessary strain in your shoulders. Ideally, try to keep your shoulders in line with the elbows and not any lower than that. You can then work up to lifting the knees off the mat. You can also place a third block under your belly for more support and to feel what the shape should feel like without the belly sinking down.
*Tip: To start to find the strength to hold chaturanga independently with good alignment, push down into your hands and see if you can hover the shoulders off the blocks by just a few centimetres. Hold for a few counts and then lower. Repeat a few times to build muscle memory and strength.
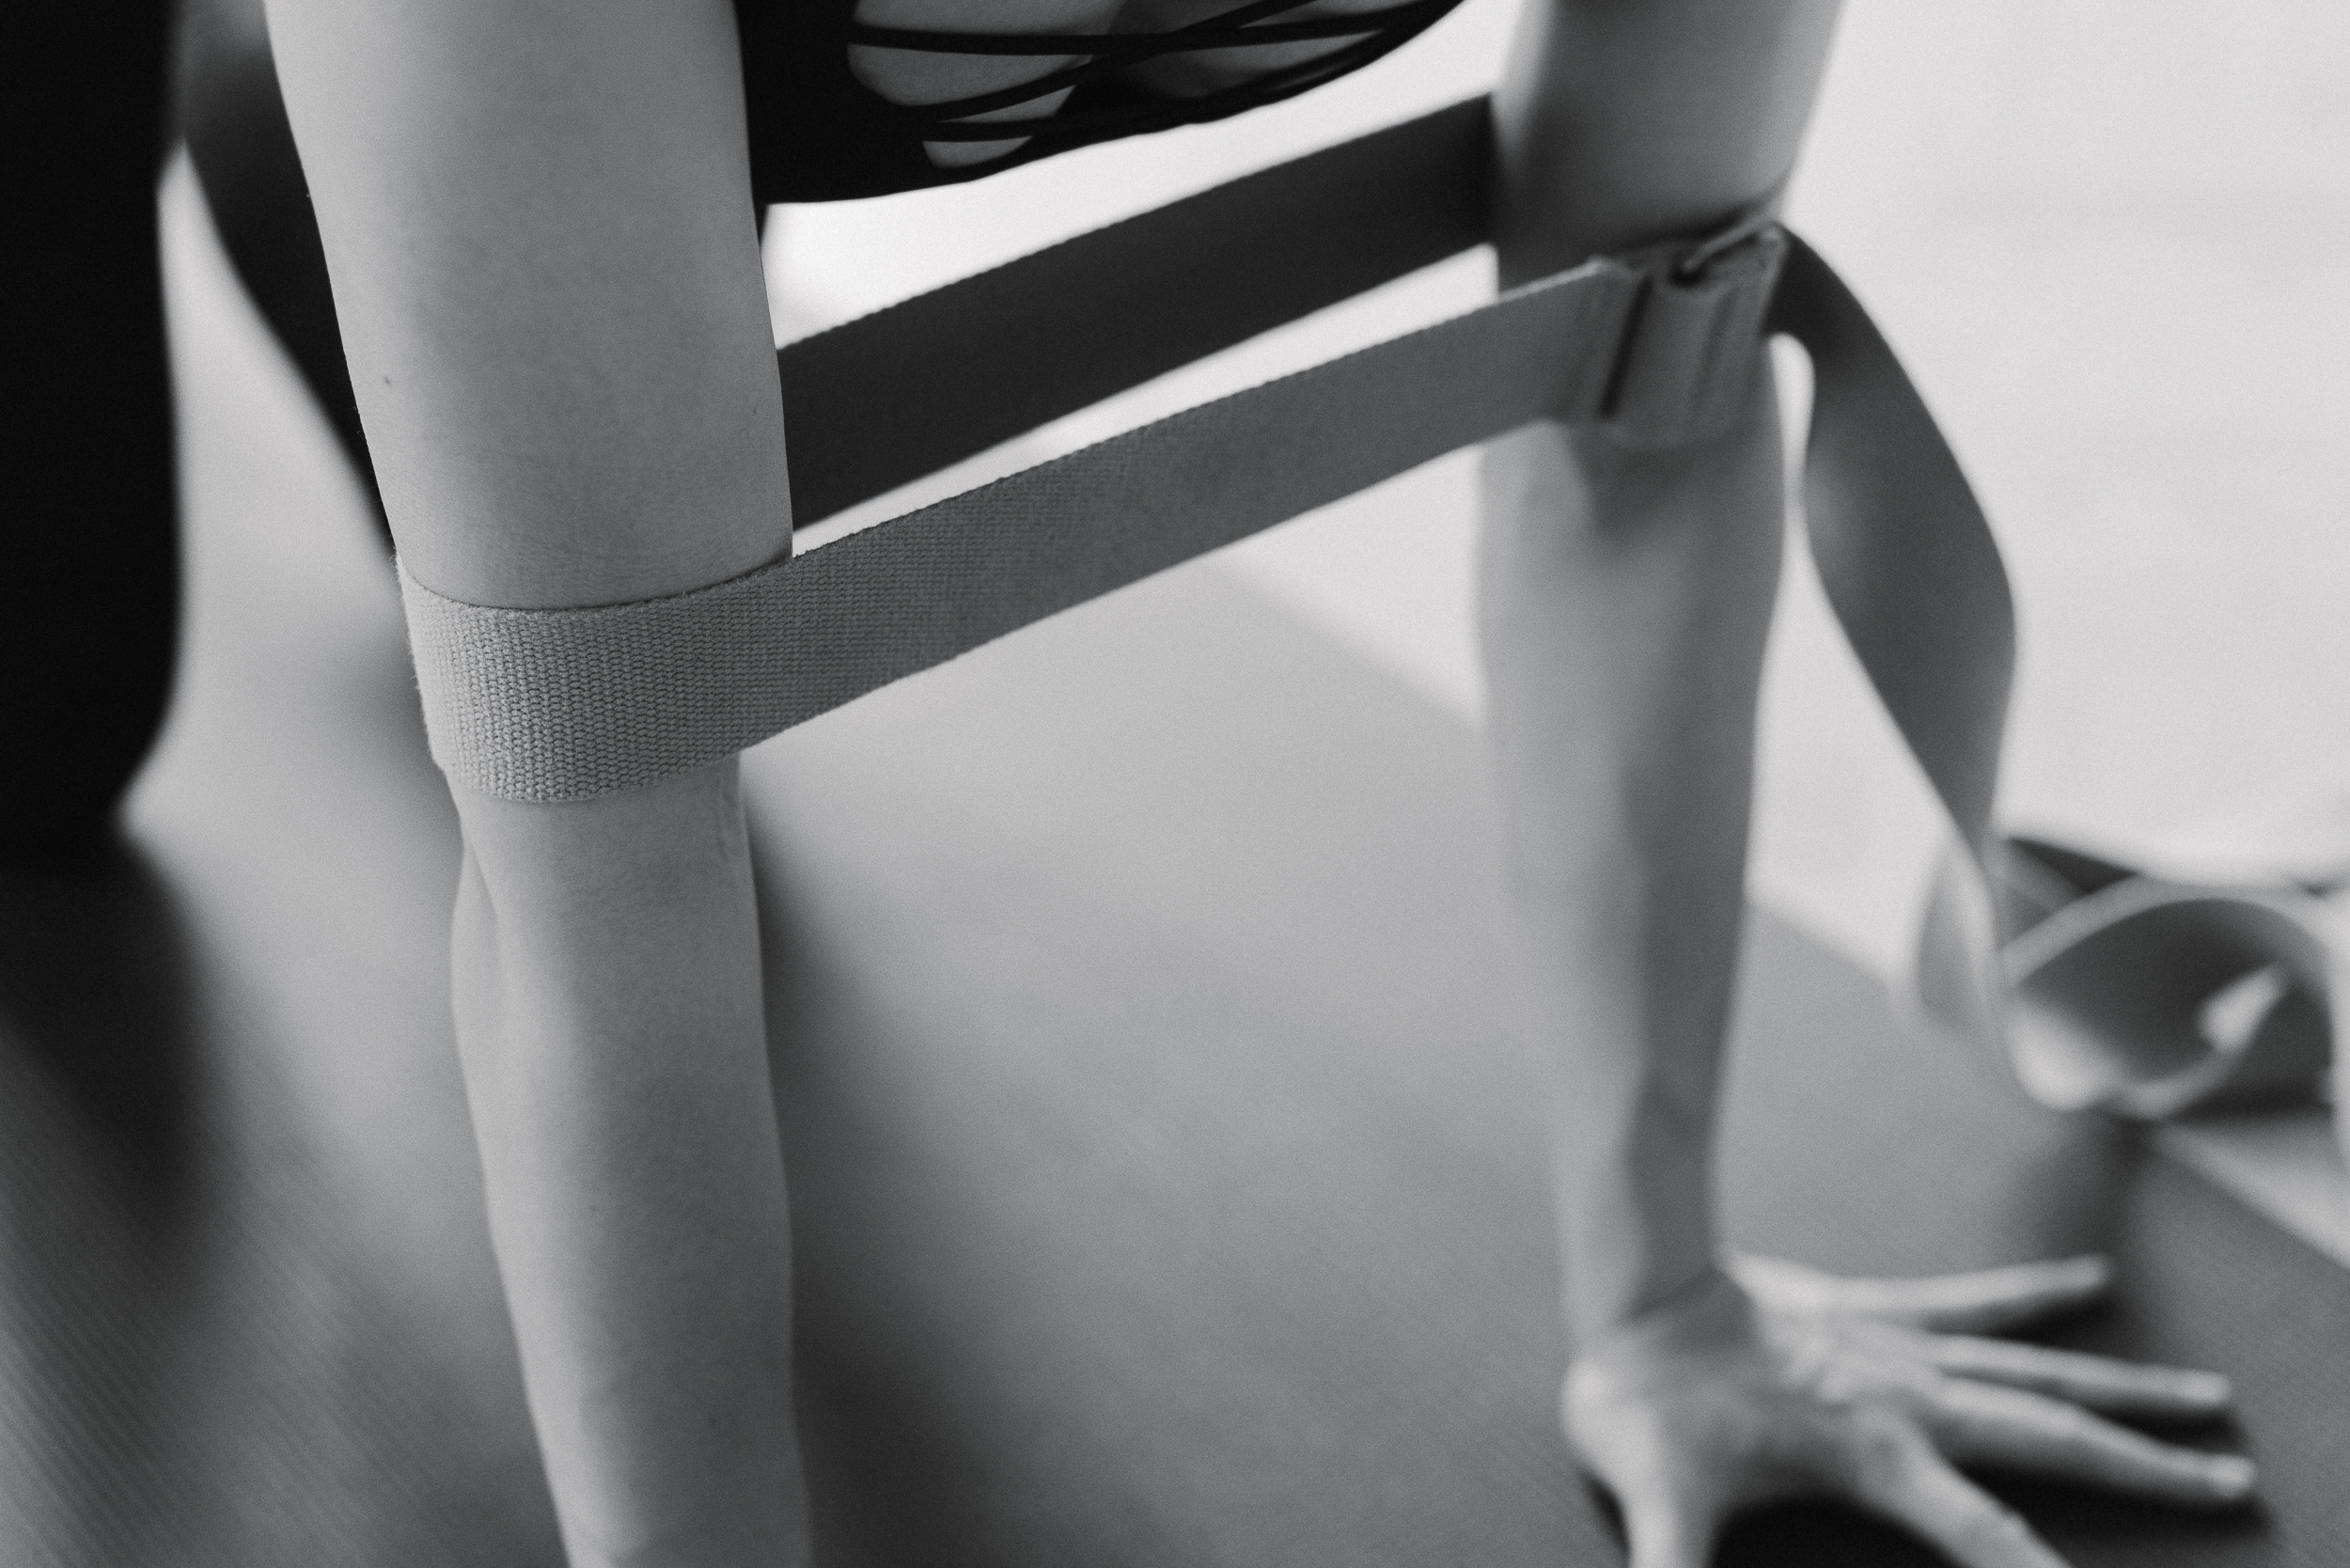
Modification 3: With a Strap
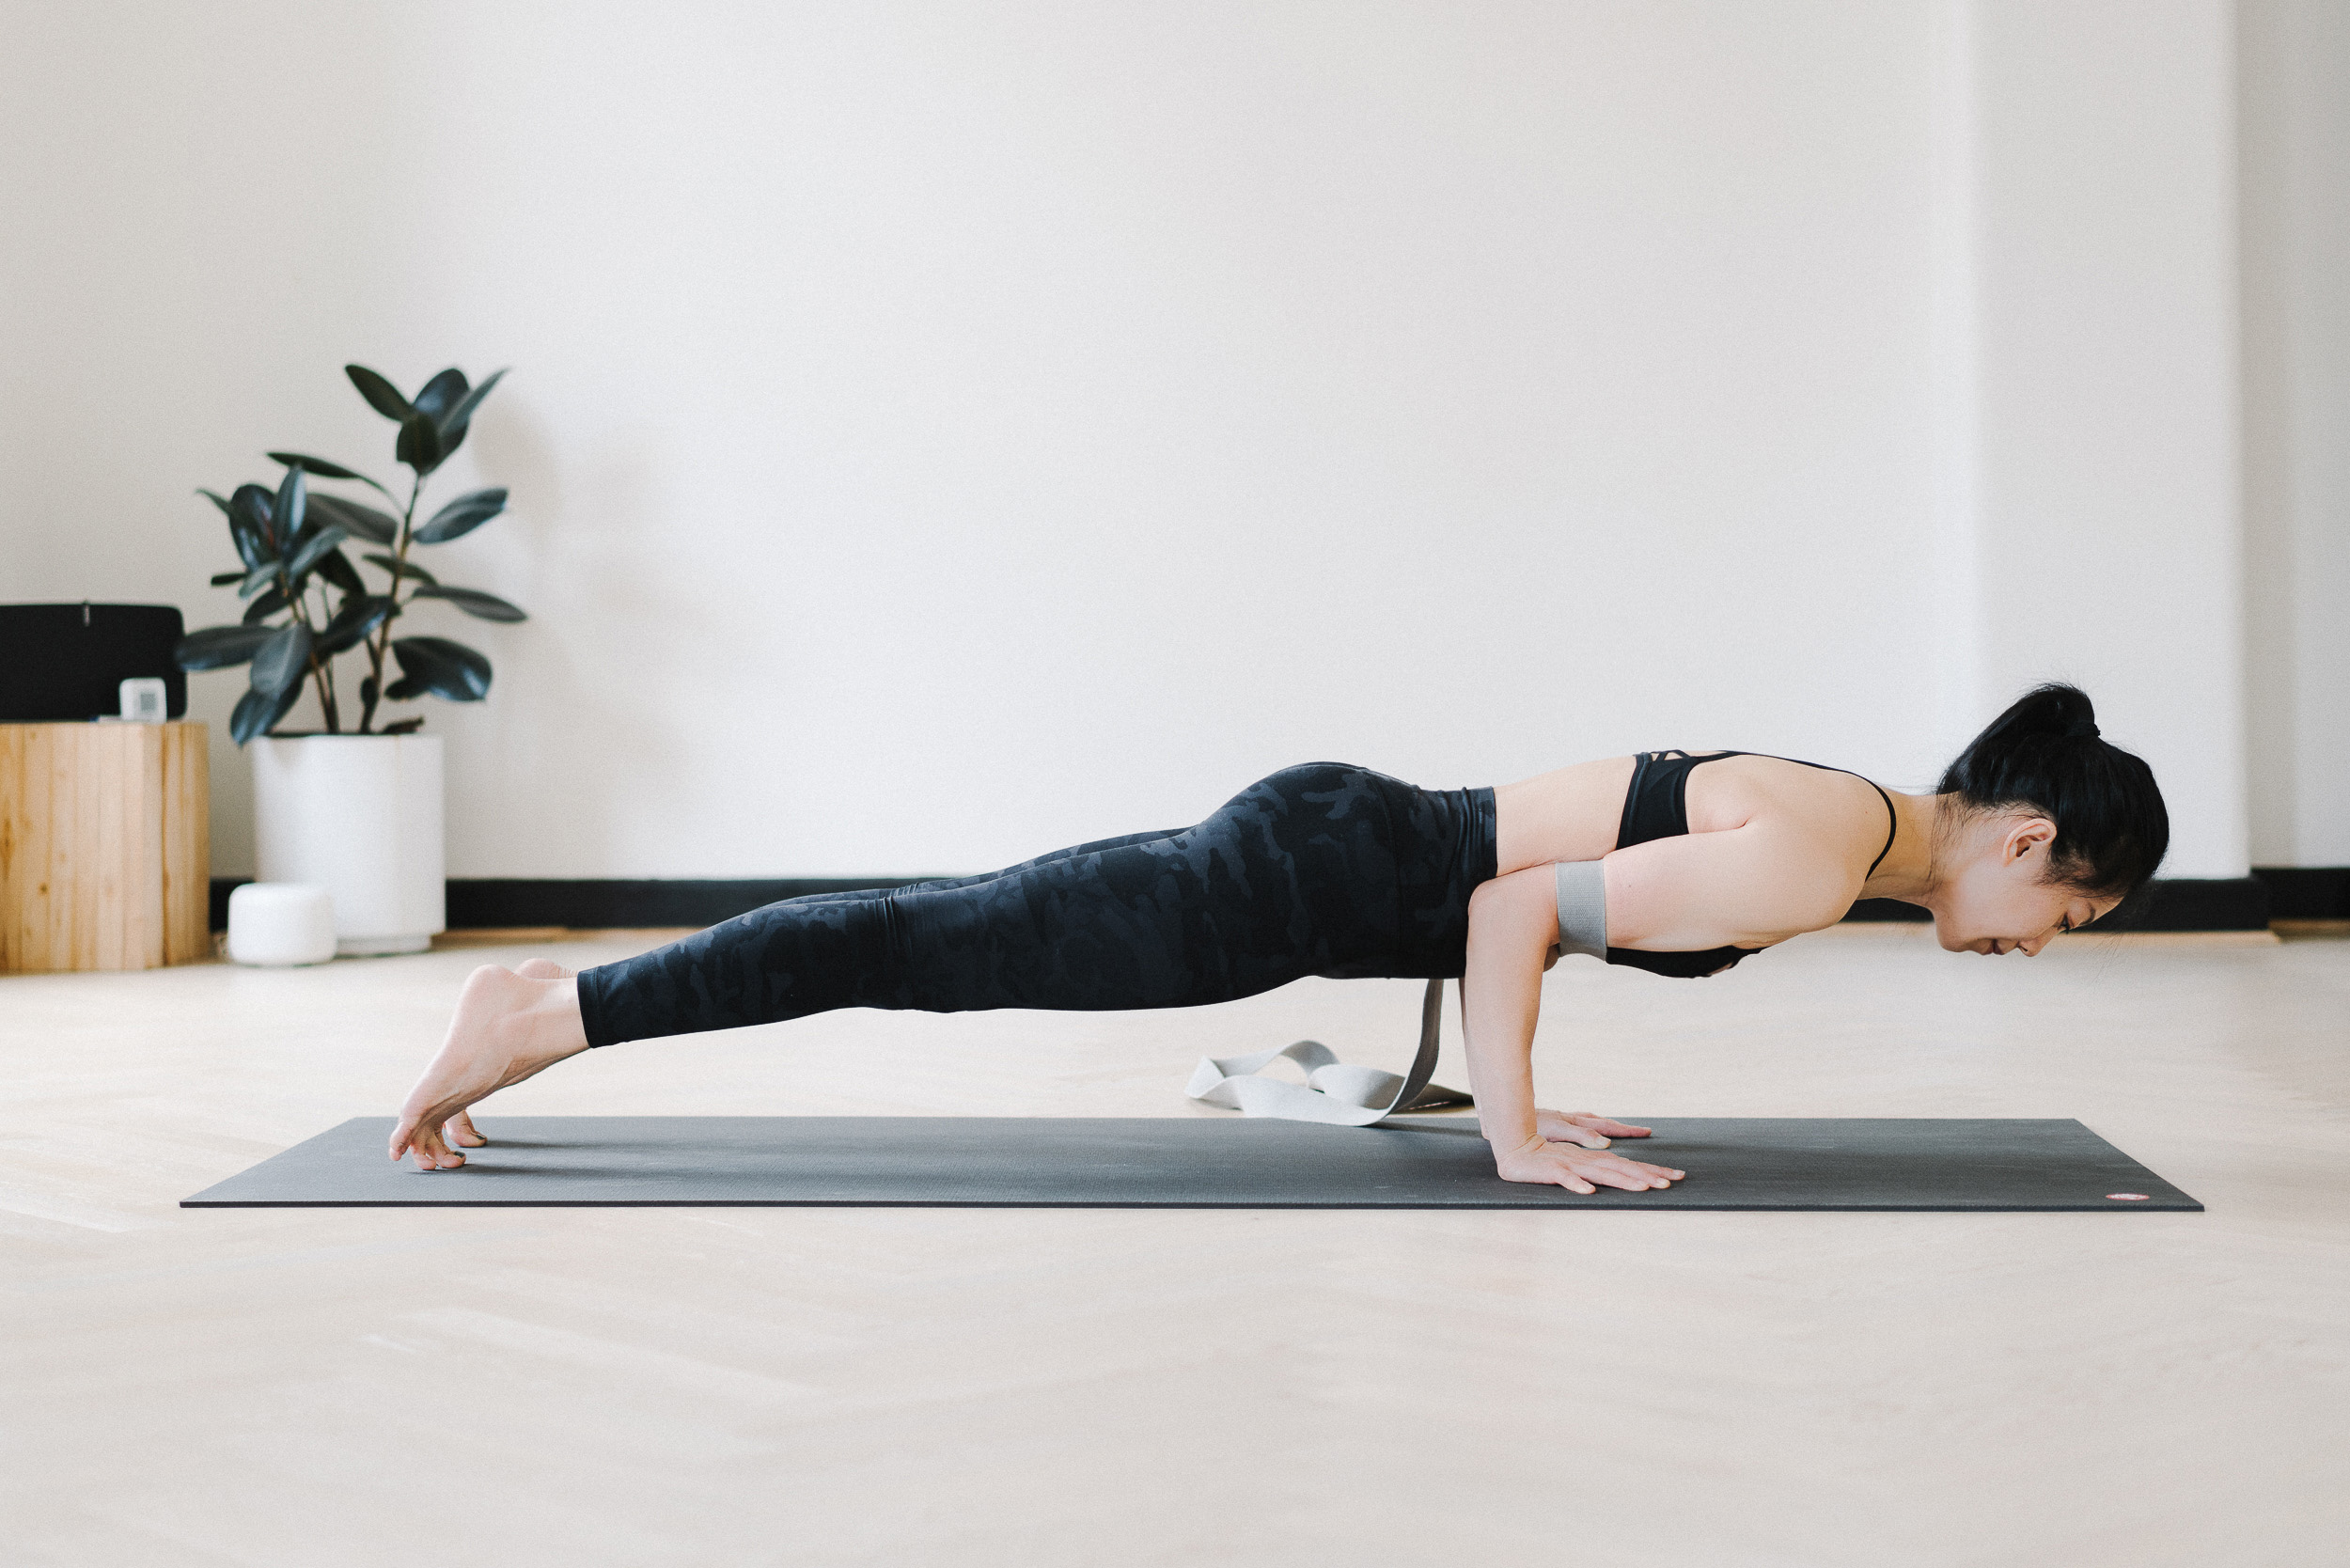
Create a loop in the strap that measures roughly shoulder distance apart. Place the strap above your elbows. The strap stops your elbows from winging out and also supports some of your weight whilst still requiring you to do most of the work by actively engaging through your shoulders, core and legs. You can do this with the knees on or off the mat. The strap will also stop you from lowering too low and keep your shoulders in line with the elbows. Tuck the tailbone under and pull the lower ribs in to avoid the bum sticking up and belly sinking.
Common Misconception & Final Tips
A common misconception is that chaturanga only requires upper body strength. Try thinking of chaturanga as a whole body experience and see if that makes a difference for you. Think of everything as opposites:
- As you reach the chest forward, you have to reach the heels back.
- As you bend the arms and lower down into chaturanga, it might feel counterintuitive but you should actually keep pushing the ground away from you as you lower to resist gravity.
- Although you’re lowering your body down, actively press the backs of thighs up to the ceiling, pull both the navel and lower ribs in, and slightly dome into your upper back.
Last tip: Flip your perspective! If you take each vinyasa as an opportunity (and not as a chore) to practice and do the work, you will get there – we promise! You’re doing the exact same routine vinyasa, but with just a change in your perception of the vinyasa, the whole experience changes. That’s why we believe that everything can come down to our studio's motto: “Same Journey, Different Perspective”.
If you would like to learn more interesting tips and breakdowns like this to strengthen your foundation and take your practice to the next level, register your interest for our next 6-week foundations yoga course, “Building Blocks”. The course is suitable for both new and experienced practitioners alike. Alternatively, come join us in one of our regularly scheduled yoga classes to explore chaturanga with one of our amazing intro offers.